
The day you have to clean your own laundry for the first time can be daunting, filled with tears and frustration. Or it can be a delightful day filled with the joy of fresh, clean clothing, if you follow our handy how-to guide.
Step 1: Pre-soak or pre-treat any stains
Napisan is the most famous brand of stain remover, but stain removers come in all shapes and sizes from liquid to powder, spray or capsule. Any of them will do the trick.
For a quick fix, there are sprays that work within minutes so that you can just spray straight onto the stain, leave it for a few minutes, and chuck it in the machine with the rest of your laundry.
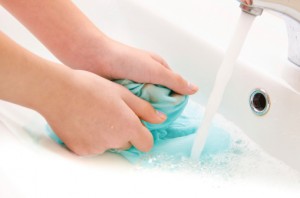
There are also liquid removers that you can use to pre-treat instead of pre-soaking the clothing for ages. A handy tip is to put the stain face-down on a paper towel and then rub the liquid remover over the back of the stained part, so that the stain comes off onto the towel and doesn’t get rubbed back into the rest of the cloth around it.
If you like an easy option, you can soak the clothing overnight in cold water with a liquid or powder remover mixed in. Some brands ask you to soak the clothing in hot water, but since hot water sometimes sets a stain, follow your own judgement there.
Step 2: Choose the right detergent for your machine
Laundry machines come in two types: front loaders and top loaders. The two types of machine work differently, so laundry detergent also comes in two types. It will be clearly labelled on the box or bottle which type it is, or it might have a big “F” on it for front loader or a “T” for top loader.
What happens if you put top loader detergent into a front loader? Front loader detergent is low foam, so if you put frothy, foamy top loader detergent into a front loader, it can froth up too much and the bubbles have to go somewhere… If the seals on your washing machine aren’t perfect, you can expect an uncontrollable avalanche of bubbles. (Trust us, we’ve done it.)
Which detergent should you use? You can’t go wrong with the one Australians have voted as being most satisfied with. ALDI Almat won our 2015 customer satisfaction award for Australia’s favourite laundry powder, while Earth Choice won the customer satisfaction award for the best laundry liquid.
Step 3: Put in the right amount of laundry detergent

Follow the instructions! Putting in too much detergent might not be as bad as using the wrong type, but it can leave your clothes coated with patches of powder or liquid residue.
If the box of laundry powder says “one full cup”, it means the little measuring cup that they include in the box, not half a metric cup or half of a water glass. If the bottle of laundry liquid says “fill lid to line”, it means only put in enough to reach the line – don’t fill the whole lid.
If you’re more of an experimenter, you’re not alone. Canstar Blue’s most recent survey of laundry powder and laundry liquids users found that 40% of Australians who use liquid laundry detergent and 27% of laundry powder users say they don’t measure the amount of detergent they pour in, as they prefer to ‘wing it’.
Step 4: Separate your whites and colours
Dark-coloured clothing such as jeans or brightly-coloured clothing such as red T-shirts can both ‘bleed’, which means the dye in the cloth leaks out and stains the other clothing in the wash. If you’ve ever seen someone on TV or in a movie who’s turned all their white clothing pink with just one red sock, you know what we’re talking about.
You should separate your clothing into these categories:
- Whites: Anything white goes in here.
- Lights: Includes pastels, pink, lavender, light blue, light green, yellow. These can go with your whites if you don’t have many whites and you don’t want to do a million loads of laundry. We know you don’t have all day to spend at the laundromat – you have a life!
- Darks: Includes gray, black, navy, red, dark purple, etc.
- Denims: Jeans and denim shorts or jackets usually have heavy buckles and things that could damage your delicates if they weren’t kept separate. Denims can go with your dark, since they’re usually dark-coloured.
- Delicates: Anything small that’s made from delicate fabric like lace, silk, satin, or thin synthetic materials goes in this category. Includes bras, underwear, lingerie, pantyhose, slips and camisoles.
Step 5: Protect your delicates
Ladies, this one is really just for you. Your bras and panties need protection from the other clothing in your wash.
There are two options. You can either wash them in a separate cycle (the one marked ‘delicate’ on your machine), or you can pop them in a ‘lingerie wash bag’ (a transparent, zip-lock, lace or cloth bag) and just wash them together with everything else.
Lingerie wash bags are seriously cheap, so there’s no reason you should have to waste water on doing a separate load of laundry just for your delicates. Be water-wise!
Step 6: Do not overfill the machine
Your laundry machine will have marked on it how many kilograms of clothing it can wash at once. Some of them even have a handy line on the side marked “do not fill past here”. If your machine is second-hand, these markings might have rubbed off. In that case, you can just use your common sense, and only fill the machine drum mostly full. If your laundry basket isn’t full to overflowing, then it should probably fit inside your machine.
How to save money when washing your clothes
Step 7: Choose the right cycle
There are cold, warm, and hot cycles you can choose on your machine. The hot cycle (60°C water) is recommended if you have any allergies and need to kill all the dustmites and pollens as well as getting a good clean. But if you don’t have that problem, then cold water does just as good a clean and it uses less electricity and water. You also need to use a cold water wash for dark colours where the dye might run in hot water, and for anything that might shrink in hot water, like wool jumpers.
Step 8: Take them out when they’re done and air out the machine
If you leave your clothes in the machine for even just an hour after they’ve finished washing, all that damp water trapped in your clothes will make your clothes start to smell bad, like mould.
It’s hard to forget about your clothes these days, with apps on every smartphone and alarm functions available even the most basic brick phones. But if you have forgotten about them and walked back to find a mildewy, stinky mess, the quickest solution is to just pop in more detergent and wash it again! If that’s not enough, you can wash them in vinegar or Napisan instead of detergent to get rid of the smell.
After you take the clothes out, you need to leave the washing machine door open so it can air dry itself. This stops mould and bacteria building up in the machine itself. You also have to clean your washing machine once in a while. You can do this by running an “empty” load with just detergent and no clothes, or by running an empty load using baking soda and vinegar mixed together instead of detergent.
Step 9: Dry them correctly
Clothes can be air dried on a washing line or tumble dried in a clothes dryer, and they’ll say on the tag which they need. Delicates will often have special care instructions that you’ll need to pay attention to.
And that’s it, folks! Now your clothes should be clean and dry.
For our handy hints guide on how to hang your laundry so that it all gets dry on the line and you never have to iron a thing, check out our other articles about laundry detergent.
Original Author: TJ Ryan
Share this article