Compare this month’s best phone plans
If you’re looking for a new mobile phone plan, the best way to find the one that’s right for you is to compare plans. Once you have a clear idea of what you want for your plan, you can compare mobile phone plans from a range of different providers, according to your criteria. At Canstar Blue, you can use our phone plan comparison tool to make this easy, otherwise, we have a range of guides and articles covering different phone plans to help you find what you need.
Compare mobile phone plans from the top telcos
Of course, you can’t talk about phone plans without mentioning Australia’s three biggest telcos — Telstra, Optus and Vodafone. These big names are popular for a reason, offering a wide range of different phone plans, across both SIM-only and plans bundled with a new mobile phone. Not only do these three telcos offer a large range of phone plans, but they also happen to run the three mobile networks which provide mobile coverage across Australia. There can be benefits to choosing a plan with one of these three telcos, so you may want to compare mobile plans from the big three to see if these phone plans are right for you.
Telstra mobile phone plans
Telstra is Australia’s biggest telco by customer size, and like Optus and Vodafone, is a ‘full service’ provider — offering a range of postpaid, prepaid, and phone-on-a-plan mobile options, as well as internet. Telstra’s mobile phone plans sit on the pricier end of the scale, but many customers prefer to pay a little extra for Telstra coverage, which is available to more than 99% of the population.
Telstra provides 3G, 4G, and now 5G services to eligible customers, and offers a good selection of 5G-ready phones at various price points, If you’re looking for a phone on a telco plan, Telstra stocks devices from Apple, Samsung, Google, OPPO, and more, to buy both outright and on payment plans over 12, 24 or 36 months.
Both prepaid and SIM-only Telstra mobile plans come with plenty of extras, such as international inclusions, data rollover, and data-free sports streaming, Postpaid plans also feature no excess data charges in Australia, and customers can add-on a range of extra such as Netflix and Kayo streaming.
Optus mobile phone plans
Like Telstra, Optus offers both postpaid and prepaid SIM-only phone plans, as well as mobile phones on handset payment plans of 12, 24, or 36 months. Optus is also rolling out its 5G network, and has begun offering coverage to postpaid, prepaid and home internet customers on eligible plans.
Optus stocks a wide range of phones, including premium devices from Apple, Samsung, OPPO, Google, and more, plus more affordable handsets at lower price points. These can all be added to Optus’ mobile phone plan range, all of which include 5G access as well as extras such as international texting, no excess data charges in Australia, and Optus Sport.
The telco has also tightened its prepaid plan range, but gives customers the option to go SIM-only or pick up a prepaid phone. Optus provides a large selection of prepaid options, including daily, weekly and monthly plans with plenty of data.
Vodafone mobile phone plans
Australia’s third biggest telco merged with broadband powerhouse TPG in 2020, and now sits in the TPG Telecom Group while remaining a provider in its own right. Vodafone’s mobile phone plans include SIM-only postpaid and prepaid, as well as the option to buy from a wide range of smartphones on a handset repayment plan.
Although Telstra, Optus and Vodafone each offer unlimited data and restricted speeds across all postpaid plans, Vodafone offers a slightly faster capped speed at 2Mbps (compared to the 1.5Mbps with Optus and Telstra plans). Vodafone’s plans also feature extras such as unlimited talk and text, mobile hotspot data, and frequent bonuses such as extra fast data.
Vodafone also provides 4G and 5G network coverage where available, and states that its network covers 96% of the Australian metro population. Although Vodafone’s regional coverage isn’t on par with Telstra and Optus, it does offer some of the cheapest plans of the big three telcos, which is a bonus if you’re looking to keep your phone bill down.
Ratings and reviews of Australia’s best smartphones
Need a new phone to go with your new phone plan? Every year, more and more phones are released across all price ranges — from the cheapest phones for under $200, to devices over $2,500. Even if you have a set budget, it can be confusing to know which phone is going to have the features you want at your price range. At Canstar Blue we publish a range of articles, guides and phone reviews to help you find the best smartphone that might have the features and price you’re looking for.
iPhones
Apple’s iconic iPhone continues to be a top pick for Aussies, with the company previously winning Canstar Blue’s Most Satisfied Customers – Smartphones award in 2021 and 2022. However, iPhones do run on the expensive side.
If you’d rather spread the cost of your iPhone 16 over a payment period, you can pick up the devices on iPhone plans from Telstra, Optus and Vodafone. These three telcos also stock previous year’s models, such as the iPhone 15 and iPhone 14.
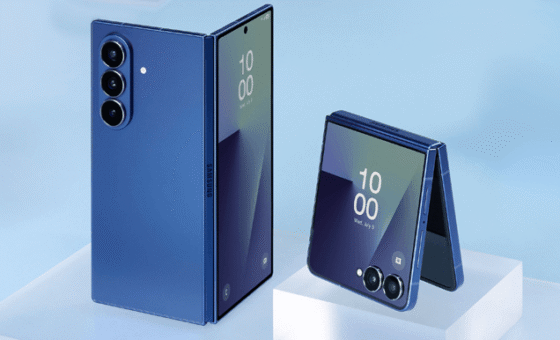
Samsung phones
The biggest name in Android devices, Samsung offers a large range of smartphones across multiple price points – from the premium Galaxy S24 and Galaxy Z lines, to the more affordable Galaxy A series. So depending on your budget, there’s likely to be a Samsung phone that’s right for you.
You can pick up any of a number of Galaxy phones on Samsung phone plans from Australia’s leading telcos, including Telstra, Optus, Vodafone, Southern Phone and TeleChoice.
OPPO phones
OPPO is one of the breakthrough phone brands of the last five years, producing both high-end and budget-friendly devices with impressive cameras and sleek designs. Prices span from under $250 for the OPPO A series, well over $1,700 for the premium OPPO Find X8 Pro.
You can purchase many of these phones on an OPPO mobile phone plan from providers including Telstra, Optus, Vodafone and TeleChoice, with a range of payment terms available.
Google phones
Google’s premium phone range, the Google Pixel series, remains a popular choice for Aussies wanting a high-end alternative to Samsung or iPhone. The Pixel 9 prices begin at $1,349 for the standard device, up to $2,699 for the advanced Pixel 9 Pro Fold.
Ad with other high-end devices, you can pick up the Google Pixel range on phones plans from Telstra, Vodafone and Optus, and spread the cost of your plan over one, two, or three years of repayments.
Learn more about 5G in Australia
5G in Australia is the next step in mobile technology, delivering faster speeds than existing 4G mobile networks. Those faster speeds mean you can enjoy things like video streaming and online gaming with less buffering and lag. As the Telstra, Optus and Vodafone 5G networks continue to roll out across the country, and additional 5G phones are released, more Aussies will be able to access these ultra-fast speeds.


 Mobile


 50% off for the first 4 mths, then $28/mth. Now extended to 31/07/25.